Embrace Autumn with the Best No-Dye Pumpkin Rice Krispie Treats
As the leaves begin to turn and a crispness fills the air, our thoughts inevitably drift to all things cozy, comforting, and pumpkin-spiced. While many fall treats feature vibrant, artificially colored hues, there's a unique charm in celebrating nature's own palette. This article introduces you to the ultimate recipe for
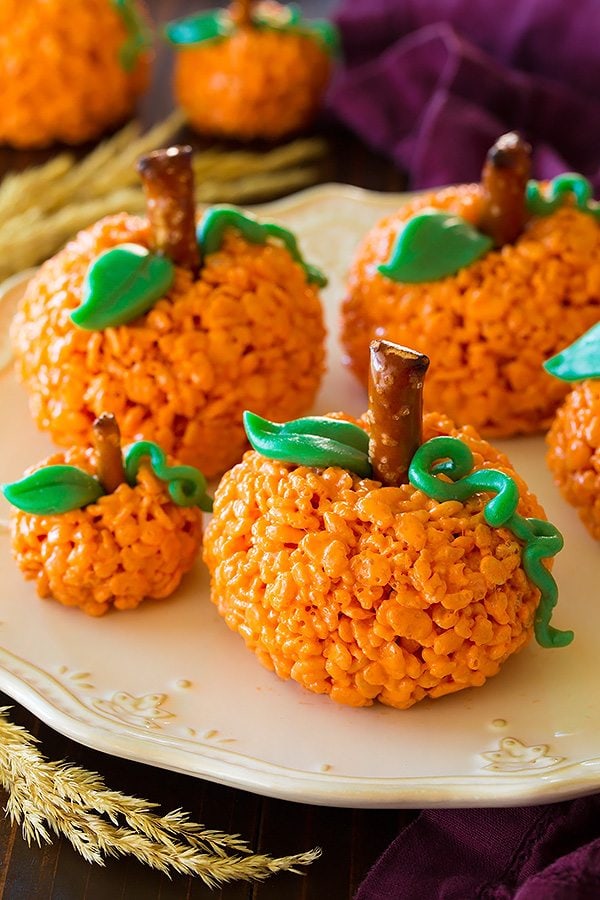
Easy 5-Ingredient Pumpkin Rice Krispie Treats that boast a beautiful, natural orange derived entirely from pumpkin puree – no artificial dyes needed! Perfect for Fall gatherings, Halloween parties, or simply a cozy evening snack, these treats are delightfully sweet, subtly flavored, and incredibly simple to make. Get ready to discover a new fall favorite that appeals to everyone, from the pickiest eaters to those with dietary preferences.
Why These No-Dye Pumpkin Rice Krispie Treats Are a Must-Make
These aren't just any ordinary Rice Krispie treats; they're a celebration of simplicity, natural beauty, and irresistible flavor. Here's why they deserve a spot on your fall baking list:
- Naturally Vibrant Color: Forget the food coloring! The star ingredient, pumpkin puree, imbues these treats with a lovely, inviting orange hue that's perfect for autumn, Thanksgiving, and Halloween festivities. It's a wholesome way to add visual appeal without artificial additives.
- Subtle, Not Overpowering Pumpkin Flavor: One of the greatest virtues of this recipe is its delicate pumpkin essence. Even if you're not usually a pumpkin enthusiast, you'll likely fall in love with these. The pumpkin adds moisture and color, with just a hint of earthy sweetness that complements the marshmallow gooeyness beautifully. It’s sweet, soft, and satisfying, without being overly "pumpkiny."
- Incredibly Quick and Easy: With only five core ingredients and minimal hands-on time, these treats are perfect for busy schedules or impromptu cravings. They come together in minutes, making them an ideal last-minute dessert or snack for any occasion.
- Versatile for Dietary Needs: This recipe is remarkably adaptable. Whether you're catering to gluten-free, dairy-free, or vegan guests, simple substitutions ensure everyone can enjoy these delightful Quick Gluten-Free & Vegan Pumpkin Rice Krispie Treats Recipe. This inclusivity makes them a go-to option for diverse gatherings.
- Crowd-Pleasing Perfection: Kids adore the gooey texture and mild sweetness, while adults appreciate the nostalgic charm and ease of preparation. They're a guaranteed hit at school parties, family dinners, or simply as a fun after-school snack.
The 5 Essential Ingredients for Pure Pumpkin Perfection
Crafting the perfect batch of no-dye pumpkin rice krispie treats requires just a handful of readily available ingredients. The quality of each component plays a role in the final texture and taste.
- Rice Krispies Cereal: The foundational crunch! You can use any brand of puffed rice cereal. For those needing a gluten-free option, be sure to select a certified gluten-free rice crisps cereal, as classic Rice Krispies often contain malt flavoring derived from barley.
- Mini Marshmallows: These are preferred over larger marshmallows because they melt much faster and more evenly, resulting in a smoother, more consistent marshmallow mixture. Fresher marshmallows also contribute to a softer, gooier treat, so check the expiration date!
- Pumpkin Puree: This is where the magic happens – natural color and a whisper of pumpkin flavor. It’s absolutely crucial to use plain pumpkin puree, not pumpkin pie filling. Pumpkin pie filling is already spiced and sweetened, which would alter the delicate balance of this recipe.
- Butter: We recommend using salted butter. The hint of salt helps to balance the sweetness of the marshmallows and enhance the overall flavor profile. If you only have unsalted butter, a tiny pinch of salt can be added to the mixture. For a dairy-free or vegan version, a high-quality vegan butter substitute works perfectly.
- Vanilla Extract: A splash of good quality vanilla extract brightens all the flavors, adding a subtle warmth and aroma that makes these treats irresistible.
Step-by-Step Guide to Crafting Your No-Dye Pumpkin Treats
Making these pumpkin rice krispie treats is a breeze. Follow these simple steps for perfectly gooey, naturally orange squares:
- Prepare Your Pan: Line an 8x8-inch baking pan with parchment paper, leaving an overhang on the sides. This creates "handles" that make lifting the finished treats out of the pan incredibly easy for cutting. Lightly grease the parchment paper with a little butter or non-stick spray for extra assurance.
- Melt Butter and Pumpkin: In a large, sturdy pot (non-stick is ideal), combine the butter and pumpkin puree. Melt them together over medium heat, stirring frequently until the butter is completely melted and the mixture is smooth and well combined.
- Add Marshmallows and Vanilla: Once the butter and pumpkin are melted, reduce the heat to low. Add the mini marshmallows and vanilla extract to the pot. Continue stirring gently but consistently until the marshmallows are entirely melted into a smooth, gooey mixture. Frequent stirring is key here to prevent the mixture from sticking to the bottom of the pot and burning.
- Combine with Cereal: Remove the pot from the heat. Pour the Rice Krispies cereal into the marshmallow mixture. Using a rubber spatula, gently fold the cereal into the mixture until it’s evenly coated. Avoid over-mixing, which can crush the cereal and result in tougher treats.
- Press into Pan: Transfer the warm cereal mixture into your prepared baking pan. Using the back of your spatula or a piece of lightly buttered parchment paper, gently press the mixture into an even layer. The trick here is to press lightly – compacting the treats too much can make them dense and hard instead of delightfully soft and chewy.
- Allow to Set and Enjoy: Let the treats set for at least one hour at room temperature. For quicker setting, especially if you're in a hurry, you can place the pan in the refrigerator for about 30 minutes. Once fully set, use the parchment paper overhang to lift the entire slab out of the pan. Place it on a cutting board and cut it into squares (or any fun fall shapes!).
Making It Your Own: Customizations & Dietary Adaptations
One of the great joys of this pumpkin rice krispie treats recipe is its flexibility. Tailor it to your preferences or dietary needs with these simple adjustments:
- For Gluten-Free Guests: As mentioned, classic Rice Krispies are not gluten-free due to malt flavoring. Simply swap them for a certified gluten-free puffed rice cereal, and your delicious treats will be safe for those avoiding gluten.
- For Dairy-Free Treats: Easily make these dairy-free by substituting traditional butter with a good quality vegan butter alternative. Most vegan butter brands behave very similarly to dairy butter in recipes like this.
- For a Fully Vegan Option: Combine the dairy-free butter substitution with vegan marshmallows. Many brands now offer plant-based marshmallows, often made with tapioca syrup or agar-agar instead of gelatin. Read labels carefully to ensure they are truly vegan.
- Boost the Pumpkin Flavor: While the natural pumpkin flavor is subtle, if you or your guests prefer a bolder pumpkin taste, you can add a half-teaspoon of pumpkin pie spice along with the vanilla extract in Step 2. This will amplify the autumnal notes without overpowering the treat.
- Add a Chocolate Drizzle: For an extra touch of indulgence, consider drizzling melted chocolate (dark, milk, or white chocolate chips work well) over the set treats before cutting them. Allow the chocolate to harden before serving. This adds another layer of flavor and visual appeal.
Tips for Perfect Pumpkin Rice Krispie Treats Every Time
Achieving that ideal balance of gooey, chewy, and crispy is simple with a few insider tips:
- Don't Overcook the Marshmallows: This is perhaps the most crucial tip! Once the marshmallows are fully melted and smooth, remove the pot from the heat immediately. Overcooking marshmallows can make your treats hard and brittle rather than soft and chewy.
- Use Fresh Marshmallows: Stale marshmallows can be difficult to melt properly and may result in a less desirable texture. Fresh marshmallows contribute to a wonderfully soft and pliable treat.
- Press Lightly: When transferring the mixture to the pan, resist the urge to pack it down firmly. Gently pressing ensures the treats remain airy and chewy. Too much pressure leads to dense, hard squares.
- Stir Constantly on Low Heat: When melting the marshmallows with the butter and pumpkin, keep the heat on low and stir frequently. This prevents burning and ensures an even melt.
- Storage is Key: Store your pumpkin rice krispie treats in an airtight container at room temperature. They are best enjoyed within 2-3 days for optimal freshness and texture.
- Can You Freeze Rice Krispie Treats? Absolutely! To freeze, allow them to cool completely and cut them into squares. Wrap each square tightly in plastic wrap, then place them in a freezer-safe bag or container. They can be frozen for up to 6 weeks. Thaw at room temperature for an hour or so before serving.
These no-dye pumpkin rice krispie treats offer a delightful blend of simplicity, natural charm, and irresistible flavor. They’re a wonderful way to celebrate the autumn season without artificial colors, making them a healthier and equally appealing option for everyone. Whether you're whipping up a batch for a festive gathering or simply enjoying a quiet moment with a warm drink, these treats are sure to bring a smile to your face. So gather your ingredients, follow these easy steps, and enjoy the pure, natural goodness of homemade
pumpkin rice krispie treats this fall!